Category: Guitar how-to’s

  • Want a Better Guitar Sound? Try This Pedal

    Want a Better Guitar Sound? Try This Pedal


    I know a compliment when I see one

    And that text, my friends, is why you need an EQ pedal.

    Let’s rewind.

    My live tone problem

    The last show I played with my band, my guitar sounded way too muddy for my liking.

    Weirdly, I had dialed in what I thought was a good sound during our practice sessions. But when I got to the venue? No dice.

    Every room, building, and venue will have its own distinct acoustics that will change your sound in idiosyncratic ways.

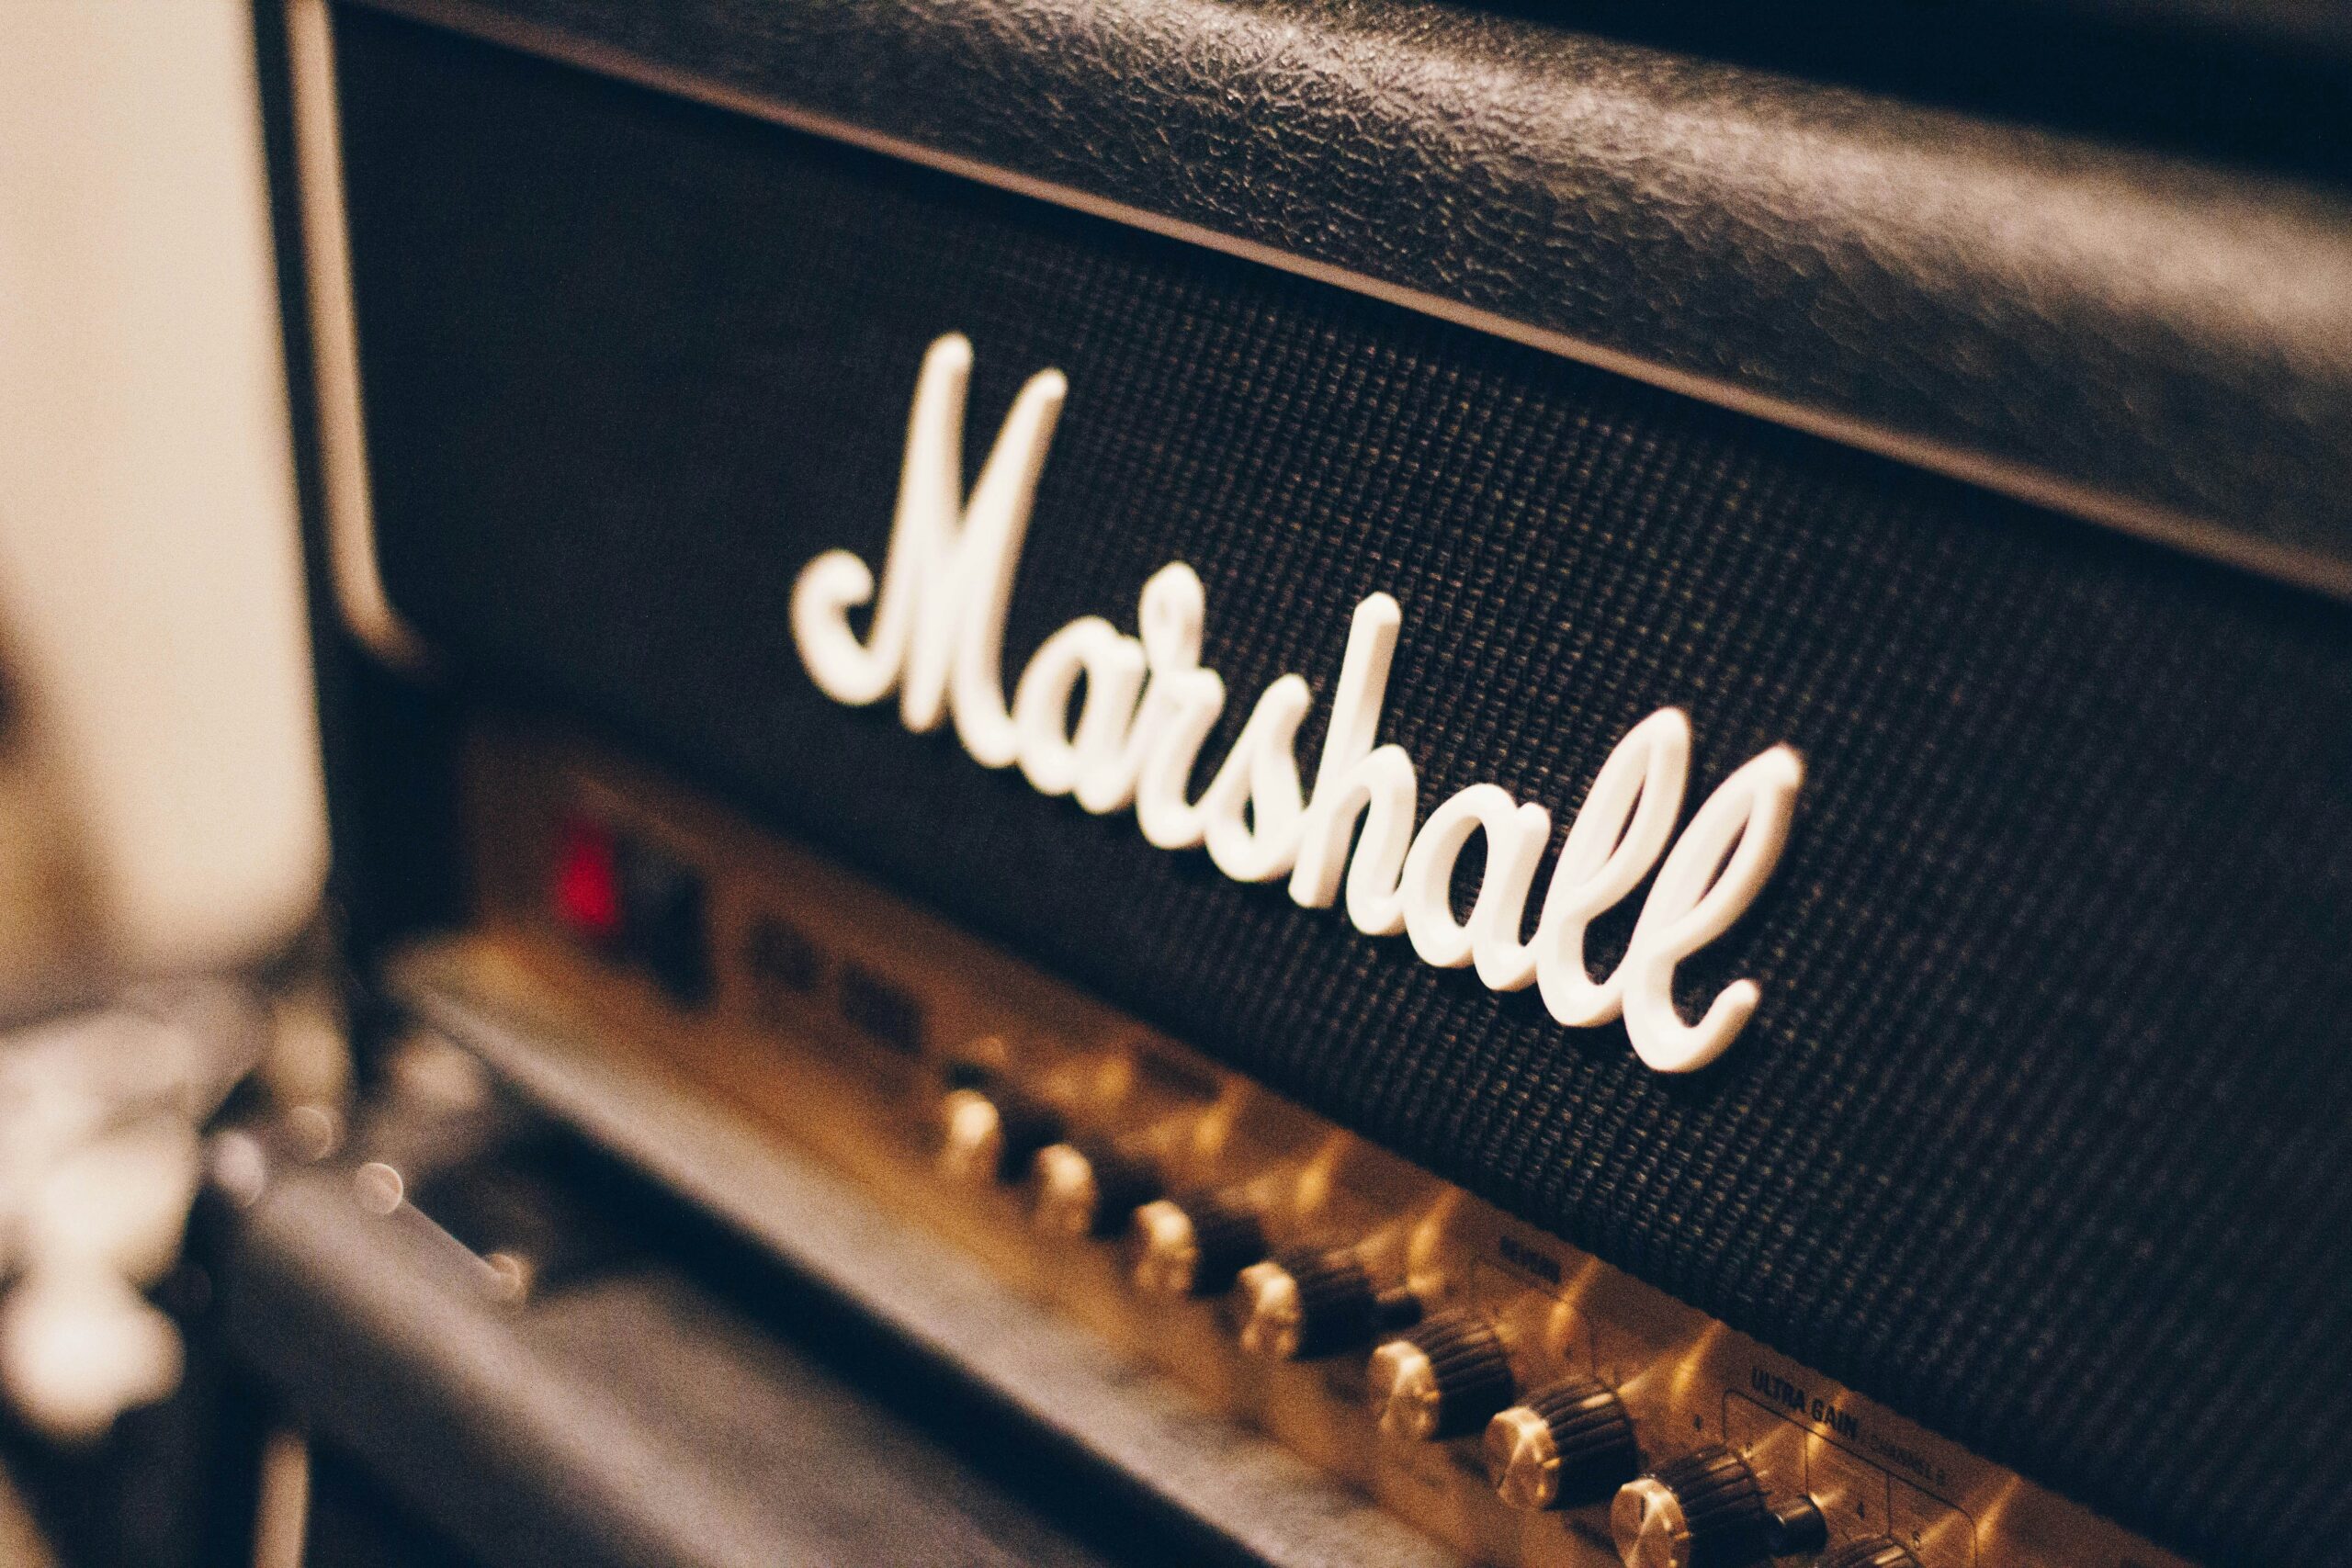
    Something about the place was accentuating bass frequencies — whether it was the placement of my amp, the stage’s resonance, the house mix, or the room itself, I couldn’t say. But even with the bass dial on my Marshall turned all the way down, it still sounded woofy.

    Fun venue, not-so-fun room acoustics.

    As it turns out, this is normal — every room, building, and venue will have its own distinct acoustics that will change your sound in idiosyncratic ways.

    In this case, I simply wasn’t able to eliminate low frequencies with my amp’s control panel. So now what? How was I supposed to turn the bass down past zero?

    And that’s when it hit me: I needed an EQ pedal. But as I found out, an EQ pedal can do so much more.

    What is an EQ pedal, exactly?

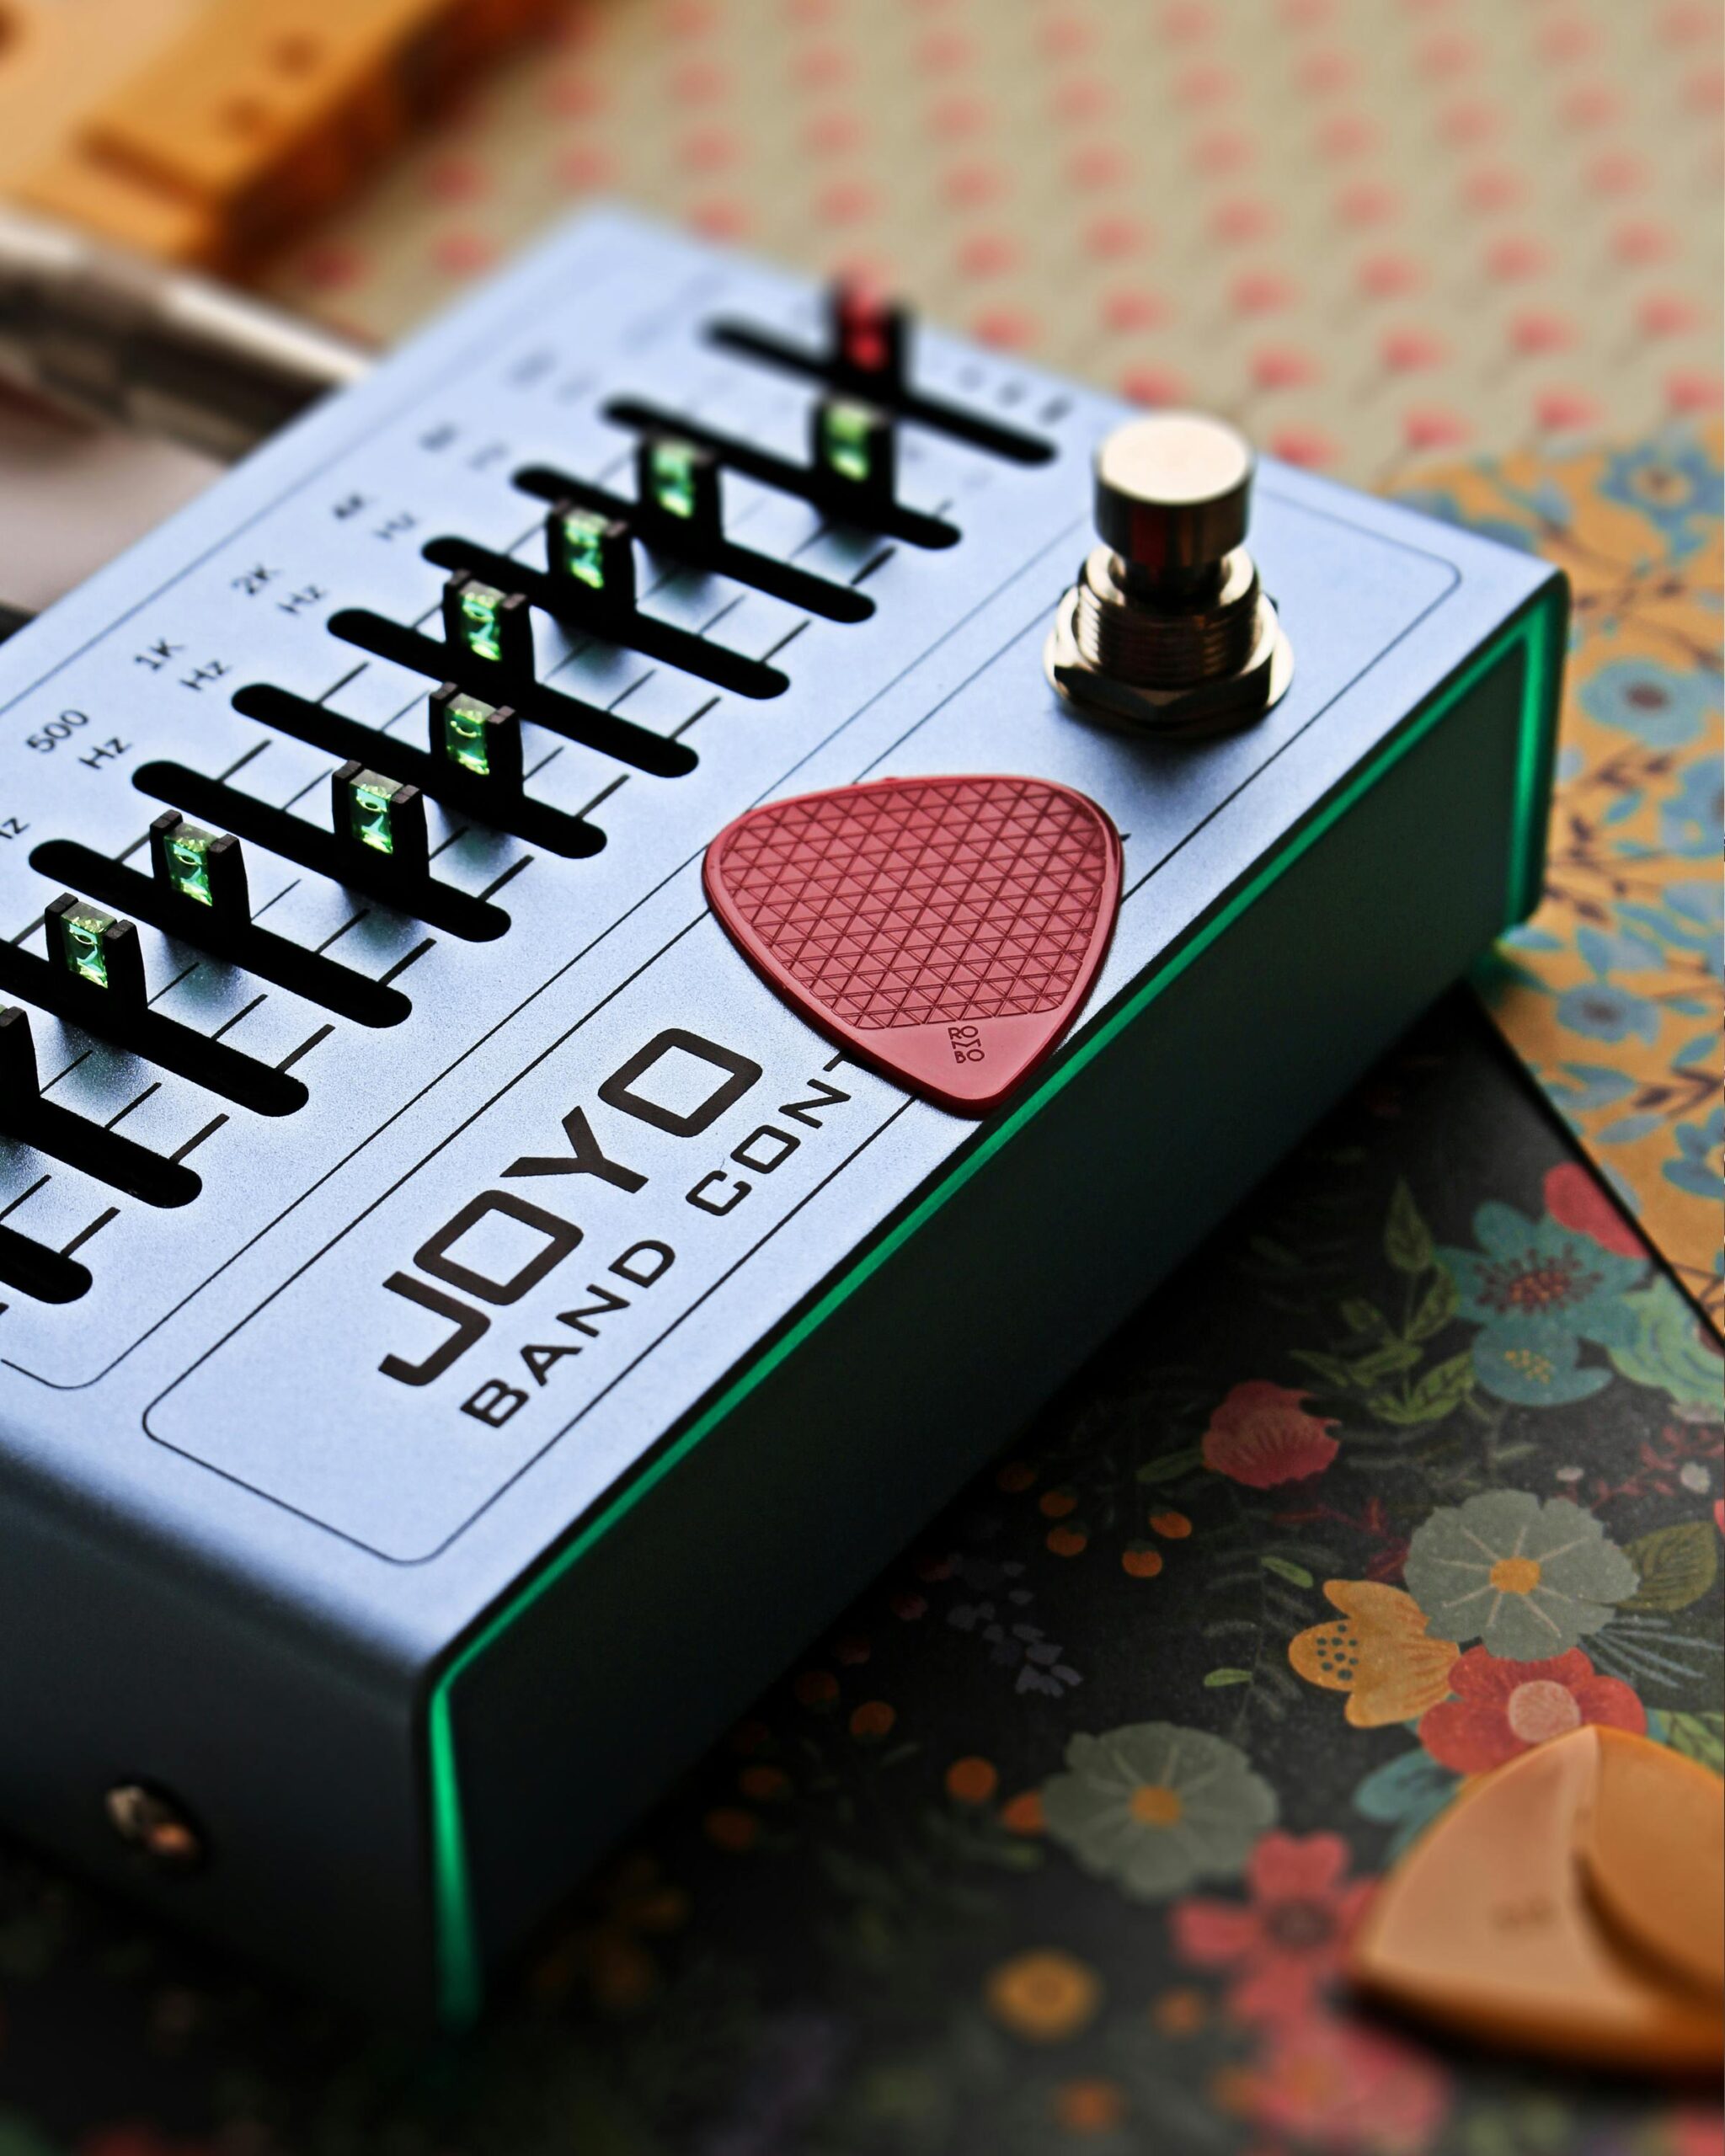
    An EQ pedal is essentially a filter allowing you to independently boost or cut a wide range of frequencies in your guitar signal — to a much greater degree than your amp.

    Every brand will be slightly different, but in general, most EQ pedals have between six and 10 frequency bands. These bands are usually controlled by sliders that allow you to quickly isolate and adjust a specific frequency. You can cut each out entirely, send it through the ceiling, or do anything in between.

    Different EQ pedals allow you to control different frequencies, as well, but most are going to have sliders for a selection between 100 and 5K Hertz (Hz).

    An EQ pedal is essentially a filter allowing you to independently boost or cut a wide range of frequencies in your guitar signal — to a much greater degree than your amp.

    The lowest frequencies (below 250 Hz) provide depth and warmth to your guitar’s sound but can also cause muddiness (my stage problem).

    Mid frequencies (250–4K Hz) are where the main portion of your guitar’s sound sits, which should be no surprise since the guitar is a mid-range instrument. But overdoing things here can give you a boxy sound.

    High frequencies (above 4K Hz) enhance clarity and brightness, but too much emphasis on these frequencies results in a sharp, piercing tone.

    Some EQ pedals will also come with a volume slider. This is because—for scientific reasons that I don’t understand—when you adjust frequencies up or down, the volume level also changes. If you cut a few troublesome frequencies, for example, you’ll notice your guitar is no longer quite as loud.

    How to dial in an EQ pedal

    The short answer is “use your ears.”

    Seriously, I watched a ton of tutorial videos and did a lot of research, and there is no “right” answer. It 100 percent depends on what you’re looking to achieve with it.

    For example, if you have a guitar with humbuckers and want to make it sound closer to single-coil pickups, you can set up your EQ pedal to do that (tutorial here).

    If you like your distorted signal but it sounds a bit too harsh, you can dial back the frequencies between 1K and 3K Hz.

    If you want your guitar to have a lo-fi radio sound, you can boost the middle sliders and lower the rest.

    Generally speaking, cutting 400 Hz and boosting 800 Hz will both positively affect your sound.

    The possibilities really are endless, but there are some general rules that can help.

    Placement matters. If you want to change your tone, consider placing it at the beginning of your signal chain. If you want to keep your tone but just sculpt or shape it, add it at the end of your FX loop.

    Don’t be afraid to experiment. Take each slider down to 0 and up to 100. Crank the lows and cut the highs, or vice versa. See how a 25% cut compares to an equal boost. Mix and match. The best way to learn how any pedal works is to try things and listen.

    Cut first, then boost. If you don’t like your sound, try reducing certain frequencies before boosting anything. Sometimes the solution is as simple as removing a few unwanted frequencies.

    Use the 400–800 rule. Generally speaking, cutting 400 Hz and boosting 800 Hz will both positively affect your sound.

    Let YouTube be your guide. Seriously, there are so many quality tutorial videos that will get you started (I like this one and this one).

    The small yet significant result

    Using what I’d learned, I started messing around with the new EQ pedal I’d just bought (this one, if you’re curious). I decided to make it the last pedal in my FX loop because I wanted to shape the overall sound coming out of the amp, not fundamentally alter it.

    First, I tried about every setting I could think of just to see what each sounded like. What if I cut all the lows? What if I raised the mids? What if I made a smiley face? A frowny face?

    The result was slight yet significant. It was the same tone, just better. Tighter. More “professional” sounding.

    But each of these trials affected the sound too much. I wanted a light touch.

    I found that for my setup, it was as simple as boosting 800 Hz to about 75 percent and cutting 400 Hz to about 40 percent. I slightly cut the remaining low and high frequencies.

    The result was slight yet significant. It was the same tone, just better. Tighter. More “professional” sounding to my ears.

    I tested out my newfound pedal and setting at church a few weeks back. The text message from the beginning of this article? That was from my worship director after the service. She had no idea I’d used an EQ pedal — a perfect blind test.

    And now I can’t wait to go back to the “bassy” venue with my band and see how well it fixes my low-end problem.

    Going from 99% to 100%

    In my last article, I said that upgrading to a Gibson SG and Marshall tube amp took my tone from 95 percent of where I wanted it to be to 100 percent.

    I lied.

    I now realize it only took my tone to 99 percent. Adding an EQ pedal to the end of my FX loop added that last percent. I’ve now got a tighter, cleaner sound — and people can tell something is different.

    So does that mean you should run out and buy an EQ pedal? I have played for decades without one and lived to tell the tale, so no, I don’t believe they are necessary.

    But if, like me, you’re looking to gain an edge and get yourself closer to a desired tone, I’d absolutely invest in one. It might just surprise you how much it helps.
  • How to Dial in a Killer Chorus Pedal

    How to Dial in a Killer Chorus Pedal


    I’ve always treated my chorus pedal like a Crock-Pot: set it and forget it.

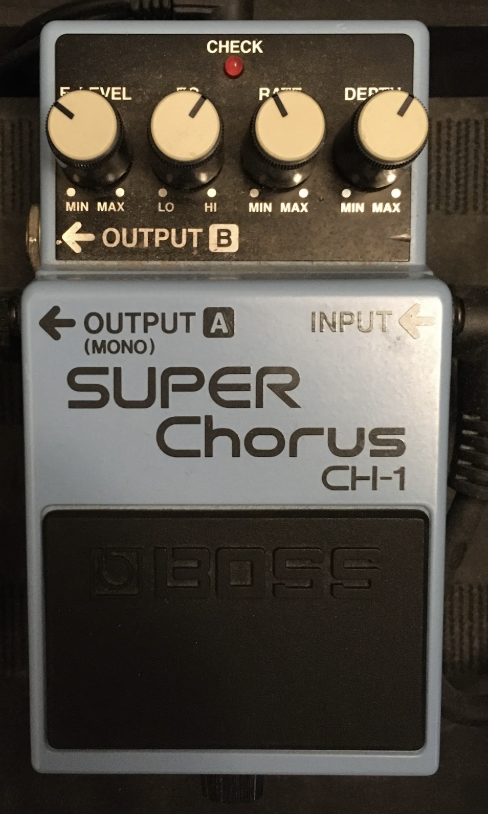
    I got my most recent chorus pedal, a Boss CH-1, a number of years ago. I found a decent enough setting, turned the effect way down for fear of bringing the 1980s back to life, and left it at that.

    But lately I’ve been wondering…how can I actually make use of this as a tool? What kind of tones might I be able to get from it that I’m missing out on?

    To answer those questions, I had to go on a journey to discover more about the chorus effect, how it began, what it does, and how to dial in the right tones.

    Here’s what I learned.

    A brief history of chorus effects

    The idea of chorus as an electronic effect dates back to 1975. This was the year Roland introduced the Jazz Chorus amplifier.

    The Jazz Chorus had two speakers, and when the onboard chorus effect was enabled, one of the speakers would be slightly delayed and modulated, while the other continued to play the unadulterated sound.

    The number of guitar-centric chorus pedals in the marketplace has skyrocketed, but they all perform in basically the same way.

    Interestingly, the amp was designed for keyboards and synths, but it soon found a home among guitarists as well.

    In fact, it only took until the next year, 1976, before the chorus circuit from the Jazz Chorus was installed into a pedal, the Boss CE-1.

    Since then, the number of guitar-centric chorus pedals in the marketplace has skyrocketed, but they all perform in basically the same way.

    Understanding what a chorus pedal does

    Chorus pedals are part of a larger group of effects known as “modulation effects.” These effects all slightly delay and alter a copy of your guitar’s sound in some way. (Note: For any effect in your signal chain, your guitar’s normal sound is called the “dry” signal; the altered copy is called the “wet” signal.)

    In short, a chorus pedal takes the sound of your guitar, copies it, delays the copied version by a few dozen milliseconds, and modulates it before playing it back alongside the dry signal.

    This process was designed to mimic multiple human voices singing together (hence the name, “chorus”). Since humans aren’t perfect, when a group sings together, even in unison, slight natural delays and waverings occur, which our ears perceive as making the sound bigger and fuller.

    (That’s also why a choir sounds like a group of people singing together and not just one person singing extra loud.)

    A chorus pedal takes the sound of your guitar, copies it, delays the copied version by a few dozen milliseconds, and modulates it before playing it back alongside the dry signal.

    It’s this natural variation, leading to a fuller sound, that chorus pedals are designed to emulate.

    They do this via two primary settings: rate and depth.

    • Rate affects the modulation. Turn the rate down, and the wavering gets slower. Turn it up, and it gets faster.
    • Depth controls how much of the effect you get. A low depth will be subtler, while with a high depth, the chorus effect will be quite noticeable.

    All chorus pedals will have at least these two settings, although they may call them different names.

    Other common settings include level and tone (or EQ).

    • Level allows you to dial in how much of the modulated sound you hear relative to the unmodulated sound.
    • Tone determines how dark or bright the modulated sound is.

    Dialing in a killer chorus tone

    Now that you understand the nomenclature, it technically shouldn’t be hard to dial in a sound you like.

    If you want faster warble, turn the rate up. If you want a darker sound, turn the tone down. And so on.

    You can get a wide variety of sounds out of most chorus pedals. And you can even use more than one at a time if you’re feeling feisty.

    But, of course, in the real world it’s not always that simple. Sometimes we don’t know what kind of sound we want until we hear it. And for some of us, our ears may not be trained enough to recognize the subtle differences a chorus pedal can sometimes produce.

    It turns out you can get a wide variety of sounds out of most chorus pedals. And you can even use more than one at a time if you’re feeling feisty.

    But rather than trying to explain all of your options, in my research I ran across a video that samples a range of options when it comes to using a chorus pedal, and even how you can mimic a chorus effect if you don’t have a dedicated pedal.

    The guitarist in the video dials in some really cool — and very useable — sounds, so be sure to check it out.

    As for me, I’m still fine-tuning how I use my CH-1. (Like most guitarists, I’m never satisfied with my tone.) But at least now I know what I’m doing, rather than relying on randomly twisting knobs as was my previous habit.

    So how about you? How do you use your chorus pedal? Did you know what all the knobs did, or, like me, was it an effect shrouded in mystery? Let us know in the comments.

  • After 28 Years I Discovered the Secrets of Live Tone

    After 28 Years I Discovered the Secrets of Live Tone

    It turns out I’m a moron.

    Okay, maybe that’s a little harsh. (I do have a master’s degree, after all.)

    But it is true that I’ve been playing guitar for almost 30 years, and it wasn’t until the last few weeks that I figured out I was missing a rather important piece of the puzzle.

    It all started at our last show.

    Why can’t I hear myself?

    About six months ago I joined a band.

    After the first few shows, I realized my little 15W tube amp just couldn’t cut it in a rock band. (It still works great at church, though.) So I leveled up and bought a Marshall DSL40C with 40 watts of rip-your-face-off power.

    A picture of a Marshall 40 watt electric guitar amplifier
    My Marshall DSL40C. Fun fact: it weighs 50 lbs and is VERY loud. (Crappy photo by the author)

    I should have no problem being heard now, right?

    I’ve been playing guitar for almost 30 years, and it wasn’t until the last few weeks that I figured out I was missing a rather important piece of the puzzle.

    Wrong.

    At the next show, I could hear myself a little better, but the audience couldn’t. And so in between sets, I kept inching the volume up more and more.

    But it didn’t work. No matter how loud the amp got, my guitar was just getting lost in the mix. I ended the night frustrated, vowing to figure out how to solve this issue.

    The problem: “bedroom tone”

    Here is a truism I’ve learned over the years: no matter what problem you have, someone else has already experienced it, solved it, and made a YouTube video about it.

    Sure enough…

    In my case, I found half a dozen videos. And they all said the same thing.

    The culprit is “bedroom tone.” This is the tone you dial in when you’re practicing at home.

    It’s just you and your guitar, usually in a small space. If you’re a guitarist who’s just starting out, you might “scoop the mids” — i.e., boosting the lows and highs and zeroing out the middle frequencies.

    No matter what problem you have, someone else has already experienced it, solved it, and made a YouTube video about it.

    At some point, however, many of us learn to find a more balanced sound. We adjust our settings until we get a nice, thick, luscious tone with warmth and depth.

    But when you take either of those tones on the road and put it in a live setting, you’re guaranteed to get lost in the mix.

    Why? Because you’re not thinking about where the guitar sits within the band.

    One of the aforementioned YouTube videos.

    Your guitar is a mid-range instrument — so adjust your amp accordingly

    Whether you’re scooping the mids or looking for a warmer, rounded tone, the problem in a live setting is the same.

    In both cases, the low and high frequencies are fighting for space with other instruments — and losing.

    The guitar is a mid-range instrument. That’s where its strong suit is, and that’s where it wants to be.

    Emphasizing low frequencies in your guitar tone ensures you will be squaring off against the kick drum and bass, two instruments specifically designed for lower registers. Your guitar doesn’t stand a chance.

    Likewise, emphasizing the high frequencies pits you against instruments like cymbals, high hats, female vocals, and potentially the keyboard’s upper register. You won’t win these battles either (but you won’t lose them quite as badly as you will with the lows).

    As it turns out, the guitar is a mid-range instrument.

    That’s where its strong suit is, and that’s where it wants to be. But in our bedroom settings, the mids are almost always too low — both in absolute terms and in relation to the other tonal frequencies.

    That’s why I was getting lost in the mix. I was dialing in a good tone at home, but it just wasn’t translating at our shows. I was fighting with other instruments to be heard instead of finding my own sonic space to occupy.

    Given the above information, I was now able to set my amp’s EQ in a way that made sense in a band setting.

    Here, then, is the secret to live tone—the secret they don’t want you to know (kidding!):

    • Turn bass frequencies down to zero, then bring them back up just until you hear a difference
    • Turn mid frequencies all or almost all the way up
    • Set your high frequencies to taste
    • Turn your gain (including distortion and overdrive pedals) down by about 15 percent
    • Keep delay/reverb minimal (in a live situation, less is more)

    My “lightbulb” moment (it will sound like crap)

    All of the above is a summation of the various blog posts and videos I found.

    I tried to stick with solid sources (like professional musicians and sound engineers), and they all pretty much said the same thing. I was fairly confident that I was on the right track.

    And so, like the sheeple I am, I dutifully went downstairs, adjusted my amp and pedals to the advised settings, plugged in my guitar, and started to play.

    What none of the experts had bothered to tell me was, “Yes, Jon, a good live tone will sound bad in your home and by yourself.”

    That’s when I learned the most important thing — the thing none of the articles or videos discussed. But it was when the lightbulb clicked on in my brain.

    My guitar sounded terrible.

    The tone was thin, almost nasally. It was so bad, it made me not want to play guitar anymore. Why had I abandoned my amazing bedroom tone for this sonic monstrosity?

    What none of the experts had bothered to tell me was, “Yes, Jon, a good live tone will sound bad in your home and by yourself.”

    Testing in a low-stakes environment

    Nevertheless, I was not deterred. I was determined to find out if the experts were right.

    The next chance I had to play with other musicians was a practice session for the worship team at church. Using the above information, I dialed in a tone that I didn’t think sucked too bad during warm-up (I still didn’t love it).

    My guitar suddenly sounded amazing. Even more, I could clearly hear myself in the mix for the first time — regardless of volume.

    Once we started to play, I was blown away.

    My guitar suddenly sounded amazing. Even more, I could clearly hear myself in the mix for the first time — regardless of volume. In fact, I’ve literally never heard myself better.

    Even stranger, when I engaged my overdrive pedal, the crunch somehow seemed crunchier than before — even though the gain was dialed down.

    That was the moment I had to admit, the experts were right.

    A tale of two tones

    I’ve come to understand that every guitarist needs two tones: a bedroom tone and a live tone.

    Dialing in a solid bedroom tone is still important. After all, I still want to sound good even when I’m just practicing by myself. And with all of the sonic range available, why not fill it?

    But just as important is dialing in a “separate but equal” live tone. When I play a show, I want the audience to be able to hear me. I want to be able to hear me. (I mean, it’s kind of the point.)

    So rather than thinking one is better (or worse) than the other, just understand that they are meant to be used in different settings.

    Every guitarist needs two tones: a bedroom tone and a live tone.

    Your live tone will sound bad at home, and your bedroom tone will get lost in the mix at shows.

    But your bedroom tone will help you practice more and longer, and your live tone will help you be heard in your band.

    I’m excited about this new shift in my thinking, and I can’t wait for my next show. I just wish it hadn’t taken me three decades to figure it out.

  • 5 Tips to Get Better at Playing Music with Others

    5 Tips to Get Better at Playing Music with Others

    Making music with other musicians is one of the true joys in life. But like anything worthwhile, it requires effort to make it the best experience possible.

    That means playing in a band setting is not as simple as showing up with a guitar. (That is, assuming your goal is to play well.) There are a number of things you need to be aware of when you walk into a room with other musicians; some of them are intuitive, some not so much.

    But the good news is that how good a guitarist you are often doesn’t matter as much as how good you are at getting along with your bandmates and fitting in the mix. Why is that good news? Because those are skills and habits you can learn — no talent required!

    So whether you have experience playing in a band setting or are just curious about what it looks like, today I want to share with you five tips that will help you get better at playing music with others. Implementing these will help you have more fun and make better music, so let’s dive in!

    Come as prepared as possible

    The purpose of band practice is not to learn the material.

    The purpose of band practice is to work out how you’re going to play the material together.

    That means to the extent you are able, you need to come prepared.

    Now sometimes, that’s not possible. Life happens. Especially if, like me, you’re trying to juggle work and family on top of everything else, there will be days/weeks/months where practicing guitar just won’t be a priority — and that’s okay.

    And sometimes surprises happen. I recently learned “Overdrive” by Post Malone, only to walk into my band’s practice and find out we’re actually doing a reggae cover of the song. Welp, time to improvise! I’ve also practiced many a worship song for my church in one key only to find out at rehearsal that we’re playing it in a different key. D’oh!

    But by and large, most of the time I’m able to come prepared and ready to rock and roll, and you should too. You and your bandmates will have a much better time, and your stress level will go way down.

    Ask questions and collaborate

    When it comes to making music with people, collaboration is the name of the game.

    Don’t be afraid to ask questions like:

    • “What are you playing between the first and second verses? I want to play something that complements it.”
    • “I had this idea for the chorus — what do you think?”
    • “Do you want to take the lead on this song, or do you want me to?”
    • “How does that part go exactly? I couldn’t quite figure it out when I was practicing.”

    This is where the magic happens — getting everyone involved in the creative process. You’ll usually find that one question or comment spurs another and another until you’ve got a really great idea on your hands.

    So don’t be shy or think your ideas don’t matter. Speak up! (And if your ideas or questions are looked down upon, find better people to hang out with.)

    Stay in your lane

    I’m especially talking to my fellow electric guitarists on this one.

    As much as we want them to be, most songs are not simply vehicles for your immaculate guitar playing. Nor did anyone in the audience come to hear you play over everyone else.

    In a band setting, everyone has a part to play. Know yours and stick to it.

    For example, when I play at church I’m the only electric guitarist on stage, and there’s always an acoustic guitarist. That means I don’t need to strum a bunch of cowboy chords — that would just be doubling the acoustic, leading to a muddy mess. Rather, I need to primarily focus on playing power chords, triads up the neck, or little licks here and there, depending on the song.

    In fact, I’m very rarely playing all six strings any any one time. Instead, I’m narrowing my range to stay in my lane — the part of the sonic spectrum that no one else is covering.

    Your lane may look different depending on the song and who you are playing with. But figure out where you need to be and get comfortable hanging out there. I promise there will still be plenty of creative freedom!

    Use your ears…and your eyes

    All of music theory can basically be distilled into the sentence, “If it sounds good, keep playing it!”

    It makes sense that using your ears is key to making music. And as a guitarist, you need to be listening to the other band members and thinking about whether what you’re playing fits into the mix. Does your part match the song when it comes to rhythm and intensity? Are you playing over anyone (see previous point)? In other words, does it sound good?

    But using your eyes is just as important. When I play in a band setting, I’m constantly looking at the other musicians’ hands. What are they playing? How high up or down the fretboard or keyboard are they playing? When are they playing (or not playing)? How hard or soft are they playing? Doing this provides me with a ton of information — much more than just focusing on the sound — that helps me make better decisions.

    And the truth is sometimes you can’t hear everyone on the stage. (This can be especially problematic at church services, where you often don’t know what kind of mix you’re going to get from week to week.) That can leave visual cues as the only information you have to ensure you’re playing in sync with everyone else. I’ve lost count of how many times I’ve had to look over at the acoustic guitarist to know what he’s playing, even though his channel is cranked in my monitor.

    Remember that less is often more

    Everyone loves EVH, but the reality is most songs do not require your services as a guitar virtuoso.

    As I’ve started learning a lot more material recently, I’m constantly amazed at how simple some of the best songs are. Tom Petty made millions off of three chords, as has AC/DC. Dyads and triads are all over the place in rock music. A simple fill or solo can often be more effective than busting out our inner Joe Satriani.

    That’s not to say there aren’t great technical songs (there are), but you absolutely don’t need to be a shredder to make good music that resonates with the audience. Sometimes one note is enough — and sometimes not playing is the right choice for the moment. (And thankfully, it’s pretty hard to screw up a rest.)

    Bonus tip: Always serve the song

    At the end of the day, the most important rule in music is to always serve the song.

    This really encompasses each of the other tips. Everything that you and your bandmates play (or don’t play) should have the goal of benefiting the song. You may not get to show off your technical skills each and every song, but that’s okay. The best part for you to play in a given song — the part that meshes with everyone else — might be trivially easy. So? Play it anyway and take it as a chance to relax and enjoy the moment.

    These are just a few of the tips I’ve learned over the years playing with other musicians. What did I miss? Let us know in the comments below.

  • How to Navigate Mistakes when Playing Live Music

    How to Navigate Mistakes when Playing Live Music

    If there’s one thing I’m an expert at, it’s making mistakes.

    I’ve made about every kind of mistake possible — some big, some small.

    Just speaking about music (lest we be here all day), I’ve done all of these boneheaded moves — and most of them recently:

    • I’ve forgotten chord progressions in the middle of a song.
    • I’ve failed to plug in my in-ear monitors before a set and wondered why I can’t hear the click track.
    • I’ve plugged my amp into a dimmer switch for stage lighting and wondered why it was buzzing so badly.
    • I’ve knocked over my instrument during the prayer time at church.
    • I’ve bombed more solos and riffs than I can count.

    I think this establishes my bona fides as a mistake-maker extraordinaire.

    But over time I’ve used those experiences to learn how to navigate them.

    As a guitarist who plays in live settings, I’ve discovered what to do — and not do — when I do inevitably screw up on stage. And so in this article, I want to share my accumulated wisdom with you.

    So if you get frazzled by mistakes or are afraid to get in front of people with your guitar because you might mess up, read on — this one’s for you.

    Have the right mindset

    Anytime you play in front of people, you want to do a good job.

    Playing in front of an audience can be a great motivator, pushing you to grow as a musician and entertainer. This is a good thing, and it can help you learn a ton.

    But while striving for a solid performance is appropriate, striving for perfection is not. Simply put, anytime you play live you will make mistakes.

    The last time I played at church, I bombed the first song. I learned and practiced it, attended two rehearsals, and was all set to go. But then when the service started, everything went out the window!

    I screwed up the opening riff. I lost my place in the song (even though the chords and lyrics are on a giant screen in the back!). I was stumbling around on my instrument like an idiot until about halfway through when it finally came back to me.

    The rest of the service went off without a hitch.

    But you know what? That stuff happens. TO EVERYONE. Every musician from beginner to professional has stories about how they screwed up on stage. It’s all part of the experience of making music.

    And because of that, no one expects you to be perfect either. So why would you expect it from yourself?

    Think about the audience’s point of view

    Why do people attend concerts?

    While there may be a few jerks out there who go to point out all the mistakes they see (and who cares about them?), the vast majority of the crowd is there to have a good time.

    Furthermore, most of them don’t play the guitar. They can’t tell a Strat from a Les Paul or a Mixolydian scale from an Aeolian one. They certainly can’t tell if you hit a wrong note during a solo.

    And more importantly, they don’t care. As long as they are having fun, it’s “mission accomplished” as far as they are concerned.

    I have lost count of the number of times I felt like I played terribly, only to have people compliment me afterward. I used to even ask, “Didn’t you hear me mess up on the first song?” One hundred percent of the time the answer was, “No, you sounded great to me!”

    The bottom line is that the average audience member literally cannot tell when you make a mistake, so it’s just not worth stressing out over.

    Get through it and get back on track

    Now that you’ve got the proper mindset, how do you handle on-stage mistakes when they do happen?

    First and foremost, just get through it.

    Most mistakes aren’t anywhere as major as we make them out to be. A couple of wrong notes aren’t going to ruin most songs. A flubbed chord change is just a passing element of a song, even if it feels like an hour when you’re the one doing the flubbing.

    So when you find yourself in the middle of a mistake, just power through it like you own the place and get back to the right notes when you can.

    You can even stop for a moment to recalibrate and center yourself if need be. It’s better to have an unplanned beat or two of rest than get completely flustered and prolong the issue. Just take that extra second or two to relax and find the song again. Your mistake will soon fade into oblivion.

    Don’t acknowledge it

    The corollary to the above point is this: you must pretend like everything is fine.

    Normally ignoring a problem is not a great strategy, but in a live band setting, it’s definitely the way to go.

    Remember how I said most audience members can’t tell when you make a mistake? Well, if you grimace, curse, or look around sheepishly, you will blow your cover. They will know you messed up because you’re broadcasting it to them with your body language.

    So rather than react, don’t acknowledge it. Act like as far as anyone else is concerned, you played exactly what you meant to play.

    Later, in private, you can acknowledge and work on any parts that gave you trouble — just not during the show.

    Come prepared

    I hope at this point I’ve helped you realize that making mistakes while playing live music is a) going to happen and b) not a big deal.

    But, of course, we all still want to minimize the impact of mistakes on our playing. And it turns out the absolute best way to handle mistakes is not to make them in the first place.

    This means practicing. And practicing. And then practicing some more.

    The more you can learn your setlist and parts ahead of time, the better off you will be. When you do make the inevitable mistake, knowing the song well will help you jump back on the horse quickly.

    There is just no substitute for practice and preparation.

    Have fun

    At the end of the day, we make and listen to music for the sheer enjoyment of it. How is stressing out or fearing mistakes enjoyable? It’s not, that’s how.

    So more than anything else, the biggest takeaway from this article should be “enjoy yourself.” And when you make a mistake? Don’t worry about it. Move on. Have fun! (We’re not curing cancer, after all.)

    The next time you find yourself in the middle of a mistake, follow the above process and let me know how it goes. And if you have other tips on how to navigate mistakes during a live performance, let us know in the comments!

  • 5 Techniques to Level Up Your Guitar Game

    5 Techniques to Level Up Your Guitar Game

    All of us started out as guitar noobs.

    We all had to endure the callous-inducing pain of learning how to play. At the time, it seemed like even getting our fingers to cooperate was too hard a task to master.

    Yet we finally got the hang of it, and before long we could play some basic chords.

    For many of us, however, our progress stalled once we mastered G, C, D, and Em. Some of us continued on to power chords or maybe learned the basic minor pentatonic scale or a blues lick or two.

    Sure, it was enough to (badly) play a song around a campfire. But this plateau is very much still in Beginner Town.

    So if you find yourself here — firmly established as a beginner — but want to advance to the intermediate level, this article is for you.

    Today I’m going to show you five easy techniques you can implement in your playing to help you finally get off of that plateau and transition from beginner to intermediate guitarist.

    Sustained chords

    This trick works even with basic open chords, so it’s a good place to start.

    The idea is there are times when a slight change to a chord can really make a song pop, and this is often the result of adding in a sustained, or sus, chord at just the right time.

    Sus chords are made when the third of the chord is replaced by the note above or below it. But you don’t really need to know the theory to use them.

    A couple of super-easy sustained chords are Asus4 (x-0-2-2-3-0) and Asus2 (x-0-2-2-0-0), Dsus4 (x-x-0-2-3-3) and Dsus2 (x-x-0-2-3-0), and Esus4 (0-2-2-2-0-0). (As a refresher, an “x” means you don’t play that string.) These can all be made by either removing a finger from the fretboard (the sus2 chords) or adding your pinky finger to the standard chord shape (the sus4 chords).

    The best guidance I can give to when to substitute a sustained chord is to just try it out and let your ear tell you. It’s pretty clear when this trick works and when it doesn’t, and it won’t take long for it to become second nature for you. And once it does, your playing will start having that extra little something to it.

    If you want to learn more about sustained chords, check out Richard White’s excellent Medium article on the topic.

    Triads

    I’ve written an entire article introducing triads and how to play them, so I’ll keep it brief here.

    Basically, triads are chord shapes made up of just three strings (or notes). The beauty of triads is they are moveable: once you’ve learned a shape, you can take it up and down the fretboard anywhere and it will still work.

    And if you know your basic chords, you already know at least one triad: D.

    Think about it: the chord shape for D major is x-x-0-2-3-2. If you just play the top three strings, x-x-x-2-3-2, you now have a triad shape that you can move up the neck.

    That means if you move up to x-x-x-4-5-4, you are now playing an E triad. Keep going up to x-x-x-7-8-7 and you’ve unlocked a G triad, and so on.

    Triads are one of the most powerful — and accessible — tools at your disposal to progress in your guitar playing. I highly recommend learning them. You’ll start noticing the improvement immediately.

    Dyads

    Dyads are like triads’ little brothers. As the name suggests, you play just two notes instead of three.

    Dyads are so great because they are easy and sound good. Literally all you need to do is finger any chord you know but then only play two neighboring strings. You can play them together or one after the other — whatever works best in context.

    So if you were playing a D chord (x-x-0-2-3-2), you might choose to just play the B and E strings (x-x-x-x-3-2) instead. Congrats — that’s a dyad!

    Dyads are all over the place on your guitar (and, like triads, they’re also moveable). And the best part? If you learn a triad, you’ve learned multiple dyads by definition — just omit one of the three notes!

    Tons of great bands (for example, Weezer, The Killers, The Black Keys) use them all the time in their songs. Dyads are a terrific example of “less is more,” so they are definitely worth knowing and practicing!

    Palm muting

    Palm muting is a wonderfully easy technique that has many applications in rock-based music. The reason it’s so handy is because it extends your dynamics.

    No one wants to hear music at the same volume and intensity all the time. (If you doubt me, just sit through a junior high band concert sometime.) That’s why in every song, you’ll find some quieter sections and some louder sections.

    During those quieter sections, you can use palm muting to great effect. It communicates intensity without loudness. This is a good technique to use during the first verse of a song, for instance, or as the start of a build-up (or crescendo) during a bridge.

    This is a strumming-hand technique only — your fretting hand doesn’t change what it’s playing. To successfully pull off palm muting, all you have to do is lightly rest your strumming hand on the strings while playing. The outside edge of your palm should rest on the lower strings toward the bridge. (Palm muting works better on the lower strings.)

    You can adjust how much pressure you place on the strings until you hear a nice “chugga chugga” sound. Palm muting also works well when combined with a straight downward picking pattern (no upstrokes).

    I use this technique all the time, and when it’s right, it’ll give you — and the crowd — goosebumps.

    Use a metronome

    This last tip is really for everyone.

    Whether you’re an absolute beginner or a professional, the more you practice with a metronome, the better you will be.

    A metronome is not a crutch; it’s a tool to help you learn to play in time. In fact, even the best guitarists in the world practice with one. Many of them wouldn’t even consider working on their craft without it. It’s really that important.

    Now, do I always practice with a metronome myself? No. Sometimes I just want to play a song for fun.

    But if I’m working on a song to play in a band setting, I absolutely either use a metronome or a backing track. Because of this, by and large, my ability to play in time is pretty good. And I plan to keep it that way.

    With the plethora of metronome smartphone apps, this really is a no-brainer. Just do it!

    Real-life cheat codes

    These five techniques could almost be considered guitar cheat codes. None of them is difficult, and with a little practice, you can add all of them to your repertoire quickly, leveling up your ability in no time. So which one are you going to start working on today?

  • Do You Need to Use an FX Loop?

    Do You Need to Use an FX Loop?

    Go get your amp right now. I’ll wait.

    Okay, now turn it around and look at the back. Do you see a pair of 1/4” input jacks with the words “send” and “return” next to them?

    If so, congrats! You are the proud owner of an FX loop! …Except, what the heck is an FX loop?

    If you’re like me, an FX loop is an enigma wrapped in a mystery. For a long time, I knew they existed but had no idea why. Send what? Return how? I had an idea you were supposed to plug some pedals into it, but I always ran my pedals straight into the amp with no problems. So what was I missing?

    Well, today we’re going to find out.

    A primer on FX loops

    In order to understand what an FX (or “effects”) loop is, you have to first understand how an amp is constructed. (This is important, I promise.)

    The key is this: your guitar amplifier is actually two amplifiers put together.

    When you plug a guitar into the front of an amp, you’re really plugging it into a preamp. This preamp takes your guitar’s signal, or instrument-level signal, which is very weak, and boosts it so that the second amplifier, the power amp, can make use of it. The power amp then takes this boosted, or line-level, signal and uses it to power the speaker(s) and produce sound.

    So, in simple terms:

    • The guitar inputs an instrument-level (weak) signal
    • The preamp converts it to a line-level (boosted) signal
    • The power amp turns the line-level signal into sound
    • Rocking out ensues

    This is where the FX loop comes in. It sits in between the preamp and the power amp and allows you to plug elements of your signal chain in the space between them.

    An amp with an FX loop, then, looks like this:

    • The guitar inputs an instrument-level (weak) signal
    • The preamp converts it to a line-level (boosted) signal
    • The FX loop adds effects to the line-level signal
    • The power amp turns the modified line-level signal into sound
    • Rocking out ensues

    So, why does that matter? It all comes down to distortion.

    When to use an FX loop

    Both the preamp and the power amp are capable of adding distortion to your signal. This is because, from a technical standpoint, distortion is the result of overloading.

    When you crank the gain on your amp but not the volume, you are overloading the preamp. When you dime the volume without turning up the gain dial, you are overloading the power amp. And you’ll get distortion either way.

    Of course, you can also get distortion by running an overdrive (or similar) pedal into your clean channel. But let’s say you prefer using the gain from your preamp (i.e., cranking the gain dial) instead because you prefer how it sounds.

    But while it might sound great, it can lead to a problem.

    This video shows the difference an FX loop can make.

    If you try to run a delay pedal into an overdriven amp, the resulting sound will be muddy and unclear. And the same thing will likely happen with other pedals — chorus, reverb, flanger, etc.

    But if you add these time-based effects pedals after the now-overloaded preamp — that is, add them to the FX loop — voila! Everything sounds crisp and clear again.

    So if you a) like to crank the gain on your amp and b) use delay, reverb, or modulation effects, the FX loop could be your best friend.

    How to use an FX loop

    Unfortunately, the standard terminology used by amplifier manufacturers is confusing. Most FX loops are labeled “send” and “return” (although Fender’s say “preamp” and “power amp”). But what do these terms mean?

    “Send” means you are sending the boosted signal from the preamp to your pedal(s) that you want in the FX loop.

    “Return” means you are returning the now-modified boosted signal to the power amp.

    With all that being said (finally!), here’s how to use your FX loop:

    1. Ensure all pedals in both chains (regular and FX loop) are connected to each other and a power source.
    2. Any pedals you don’t want to include in the FX loop (distortion, compression, wah, etc.) can be plugged into the main input jack on the front of the amp, just as you normally would.
    3. Next, plug the first pedal you want to be in the FX loop into the “send” input jack with a 1/4” cable.
    4. Then, run a second 1/4” cable from the “return” jack to the last pedal you want to be in the loop.

    Note that you’ll need two additional guitar cables (that is, a total of four cables) to make this work. Also, there is a small chance you could damage a pedal if it is not designed to handle a line-level signal, so it’s best to do a little research on your exact pedals before experimenting. (In full disclosure, a lot of resources I found had this warning, but not one provided a specific example of a pedal that could be damaged in this way. So who knows?)

    Cool things you can do with an FX loop

    An FX loop can clean up a muddy sound if you use it to run your delays and other time-based pedals. But it can do some other cool tricks too:

    • Plug a volume pedal into it to use as an attenuator. This allows you to crank the power amp at home without blowing out all your windows.
    • Plug in an EQ pedal to act as a boost for solos.
    • Plug in a noise gate if your preamp hisses.

    Like all things guitar, there is no right or wrong, only preference. You don’t have to use an FX loop at all. Or you can use it all the time. You can run some, all, or none of your pedals through it. In fact, you can try anything you want.

    So now that you know what an FX loop is and how to use it, why not give it a try? You might find a great tone you never thought possible before. If you do, let us know in the comments!

  • 5 Lessons I Learned from Joining a Band

    5 Lessons I Learned from Joining a Band

    I have been playing guitar for…let’s see…carry the one…27 years.

    That is a long time.

    I thought that after closing in on three decades, I had a pretty good grasp on all things guitar.

    Sure, I’m far from a professional, but as a solid intermediate player with experience, I can handle whatever comes my way, right?

    Well, yes and no.

    Fulfilling a bucket-list dream

    One aspect of guitar I had never done in all my years of playing was being in a band. Sure, I’ve played countless times in church, but I’ve never been in a legit rock-and-roll band.

    It was, in fact, a bucket-list item for me—something I thought I would not be able to do until my kids were grown. But then my friend Donn invited me to join his band. They needed a second/lead guitarist, and he wanted me.

    And so one day I was a nobody, and the next I was a full-fledged member of a local cover band, playing for upwards of 80 people at a small bar the next town over! (Super impressive, isn’t it?)

    While this has been a dream come true for me, I also found out quickly that there are still gaping holes in my knowledge and abilities as a guitarist. To that end, I want to share with you five things I learned preparing for and playing our first show — ideas you can put into practice too.

    Don’t neglect stage presence

    When I watched some video clips of the show, I noticed my body language — or lack thereof. To be fair, the stage was tiny and I had almost no space to move, but I still looked like a mannequin. None of the emotion in my soul made an appearance on my face or in my body.

    I’d never really considered my stage presence before. At church, it was never that big of a deal, since the goal of music in a religious service is to worship God, not rock out. Standing still is okay; roaming about the stage or jumping off things would be an irreverent distraction.

    But when I transferred my “church” playing style to a bar, I just looked dead and uninterested in what I was doing.

    I’m still learning on this front, but even something as simple as adopting a wider stance (a little past your comfort level) does wonders for stage presence. I’ve already learned that for myself, keeping my feet further apart, with one foot forward, not only enhances my look but helps me play with more emotion too.

    Use earplugs!

    I played my first show without earplugs. (The thought didn’t even enter into my mind.)

    This is a bad idea.

    I probably didn’t do any lasting damage to my hearing, but because of the stage setup, I was standing right next to two cranked guitar amps and a drum set. It was LOUD (Jim Marshall would have been proud). I can imagine that a steady diet of gigs would have a major impact on my ears.

    The next day I immediately bought some affordable, reusable earplugs. They came in a carrying case that I then attached to the handle of my amp with a carabiner, which ensures I will never forget them.

    My plan moving forward is to wear hearing protection at all future shows, whether I’m in the band or the audience.

    You don’t have to be an amazing musician to play for people

    When I joined my band, I didn’t exactly know what I’d be walking into.

    Would I be as good as the rest of the band, or would I be dragging them down with my (perceived) relative lack of musical ability? After all, I’d never been in a band before; how good was I really?

    As it turns out, I am totally good enough to be in a band — and likely so are you.

    The other guys in my band are at a similar level as I am. We all love playing and do our best, but we also all have day jobs, families, and other commitments. As a solidly intermediate player, I fit right in.

    So while I can’t reproduce or embody Yngwie, EVH, or Tim Henson, I can still play chords and licks and dabble in soloing, which is more than enough to be in a band. No expertise required!

    It turns out practice makes you better

    In the lead-up to joining the band, I had to learn a lot of songs quickly. I ended up carving out about an hour per day for practicing. (I usually spend 15 minutes per day if I’m lucky.)

    This extra practice time paid off in spades. Not only did I learn the setlist, but I almost immediately noticed an improvement in my overall playing. After just a month of concentrated effort, I was able to play things I previously couldn’t. I had a lot fewer “bad” playing days and a lot more “one with the guitar” experiences. I even think my ability to dial in a guitar tone has improved.

    Now that I’ve gotten up to speed on band material, I’m not spending quite as much time practicing, but I am still at a higher baseline than previously, which means I’m playing better than ever. I just needed a bit of external pressure to get me there.

    I should have done this a long time ago

    I always thought being in a band would be too much of a time commitment. I felt it would negatively impact my family life. That’s why I placed it in the “future dream” category.

    But then I joined a band where three of the four of us are dads. We all have family and work commitments. And you know what? We just work around them.

    So sure, we don’t practice together as much as we ought to, and we don’t play a ton of shows, but the tradeoff is this is what allows us to be a band at all. And honestly, it’s not that much of a scheduling issue anyway, especially since I’m now my own boss.

    Had I known how manageable being in a local band can be, I’d have done it a long time ago. The idea that you are “too busy” is likely an excuse, because the truth is we all find time for the things we prioritize in life.

    Joining a band has been a super rewarding experience for me, and if you have the chance, I’d say jump on it! Even so, you can still improve your own playing by learning from my example. Which one of these five things resonates with you? What else have you learned in a band setting that might help our community out? Let us know in the comments!

  • Learn Basic Music Theory and Take Your Playing to New Levels

    Learn Basic Music Theory and Take Your Playing to New Levels

    I’ve been playing guitar for a long time.

    Yet in the past 3–5 years, I’ve been able to level up my playing abilities by working on the things I should have learned 20 years ago.

    Learning the minor pentatonic scale

    Okay, that’s not quite true.

    Way back when I first started playing guitar, a friend showed me how to play a basic blues shuffle in A. If you don’t know, this is just about the easiest thing you can play that sounds like you know what you’re doing. It’s one simple, repeated pattern, and there are no barre chords or technical finger movements.

    And obviously, it’s foundational for any blues playing.

    How to play a blues shuffle in A

    My friend also showed me how to play very basic solos over the blues in A by teaching me the minor pentatonic scale (first position, for you music nerds out there). This, coincidentally, is the scale used by a ton of blues and rock songs, which means once you learn it, you can at least play solos and riffs that, while not sounding great, at least don’t have any wrong notes.

    And this is where I stayed for a very long time. (In my defense, there was no such thing as YouTube in those days; learning required much more effort IMHO.)

    The minor pentatonic scale in A

    Learning the major scale

    A few years ago, I finally decided that, after 20-some-odd years of playing, I needed to up my game.

    I learned how to play major scales.

    I know, I know — it seems pretty basic, and possibly even useless, to spend your practicing playing do-me-ri-fa-so-la-ti-do. After all, nobody wants to hear a “major scale” solo in a rock song, right?

    Wrong.

    Learning the major scale has been tremendously helpful for me as an electric guitar player. So many riffs are based on it, and a surprising number of them are quite literally portions of the major scale.

    How to play the C major scale — possibly the most useful thing I know

    Additionally, learning the scale up and down the neck is super useful when you’re trying to figure out song keys or learn notes in a riff or part. It gives you an existing matrix in your brain and fingers that helps you orient yourself more quickly to any song you’re trying to learn.

    And again, just like the minor pentatonic scale, the major scale at least gives you the notes to play at any point in a song that won’t clash or provide unwanted dissonance, and it definitely helps in creating more intricate and musically interesting solos than the minor pentatonic alone.

    Learning triads

    Another major progression in my playing came when I started learning triads.

    Triads, as I’ve written about before, are simply the three (main) notes that make up a chord. Typically, but not always, it’s the root, the third, and the fifth.

    The reason they are so great is they allow you to play up and down the neck to find alternate voicings for any chord. This is especially important if you’re playing in a band that has an acoustic guitar because you can avoid doubling up parts, which often sounds muddy and uninteresting.

    Triads make you look cool and sound cool

    Once I had the power of triads literally at my fingertips, my playing immediately got better. No more cowboy chords — now I could find a chord anywhere I wanted on the fretboard, and more importantly, provide much more sonic texture and movement for a song.

    The current challenge: learning modes

    The next step in my musical journey has been working on learning the modes of the major scale.

    A mode is simply a scale that starts on a note other than the root. Yes, they have fancy Greek names, but don’t let that scare you off.

    Is there anything Rick Beato doesn’t know?

    As a basic example, if you play a C major scale, but start and end with D, you will play the notes D-E-F-G-A-B-C-D. Congrats — you’ve just played a D Dorian scale! If you do the same exercise but instead start and end with E, you’ve now played an E Phrygian scale. Each starting note has its own corresponding scale — or mode — with its own funny name.

    This becomes super helpful because a lot of rock songs are in Dorian or Mixolydian modes. (To play a Mixolydian scale, go back to the above example and this time start with G.) Modes have given me even more sonic options and tools to use to craft even better-sounding guitar parts, not to mention a much better understanding of what the song is doing as a whole.

    An artist’s progression

    You can think of the above using an example of an artist.

    When an artist first learns to paint, they work on basic shapes and lines. This is equivalent to learning the blues shuffle, a very basic pentatonic scale, or riffs and solos by rote.

    Then the artist progresses to learning basic brush strokes and color theory. Likewise, the budding guitarist learns major scale patterns and common triad shapes.

    Eventually, the artist progresses to being able to dial in their technique and use her skills to tell a particular story and convey particular emotions. As a musician begins to work on more advanced music theory such as modes, his ability to be creative on his instrument likewise begins to grow.

    The journey continues

    I’ve still got a long way to go in my own musical journey.

    I’m excited about how far I’ve come while not kidding myself about how much there still is to learn. But this is where I’m at right now, and my hope is my story can help motivate you to learn something new.

    If you want to learn or get better at any of these things, there are tons of extremely affordable resources online — literally too many to mention here — and almost all of them are great. Your best bet is to just pick one and start practicing!

  • Want to Become a Better Musician? Stop Playing and Do This Instead

    Want to Become a Better Musician? Stop Playing and Do This Instead

    When I was a kid, the adults in my life often said, “God gave you two ears and one mouth so that you would listen twice as much as you speak.”

    As a society, many of us seem to have forgotten that message.

    Much public discourse, to our detriment and shame, is really nothing more than attempts to speak over one another. It seems few are willing to hear out any competing viewpoints, and thus many miss out on the learning and growing that occurs in genuine, respectful debate.

    This epidemic lack of listening is certainly not good for society, but there is another area where listening is also just as critical: music.

    I don’t just mean the obvious — that you interact with music by listening to it. I mean that it’s subtle listening, really listening, that is an art you must master if you want to become a better musician. This includes broadening your musical tastes, refining your ear for music, and focusing on both others’ playing and singing and your own.

    So let’s take a look at the four ways listening can make you a better musician.

    Listen to good music — period

    When I was young, I liked classic rock and, well, not much else. After all, I played the guitar, and the heyday of guitar-based music was the 1960s–80s. Naturally, that is where I focused my listening attention: bands like Tom Petty, Boston, and Petra dominated my CD collection (yes, I’m old).

    Now what often happens is that as a person gets older, their tastes solidify. A kid who likes jazz is likely to be an adult who likes jazz. If you didn’t listen to country music growing up, you probably won’t listen to it as an adult. So if you played the odds, you might assume that I’m even more of a classic rock guy now, and to heck with those other, lesser genres of music. Bob Seger FTW! \m/

    But the older I’ve become, I’ve actually done the opposite: I’ve learned to embrace music from many different genres. I sometimes wonder what the Spotify algorithm must think about me. I listen to everything from Brahms and Bach to Scrapper Blackwell and Son House, Benny Goodman and Glenn Miller, Willie Nelson and Hank Williams, Nickel Creek and Punch Brothers, Stevie Ray Vaughan, the Dave Brubeck Quartet, Mammoth WVH and Foo Fighters, and Polyphia, just to name a few.

    Why did I buck the trend? Because over time, I realized something. I realized that words like bluescountryrap, and rock were terms coined by marketing teams to sell more records. In reality, there are only two genres of music: good music and not-as-good music.

    When you remove the boundaries of what good music can be, all of the sudden you realize how much terrific music there truly is out there. You discover bands and entire subcategories of music that you love and appreciate that you never even considered before. I had this happen to me (yet again) recently. I saw Chris Stapleton’s rendition of the Star Spangled Banner at this year’s Super Bowl. Even though I’m not a big modern country fan, I thought I should give his music a try. And I’m glad I did, because he is ah-may-zing. Imagine what I would be missing out on if I had just assumed because he was a country artist I wouldn’t like his music.

    Listening to a wide range of music also helps you develop your own style as a musician. In a recent Wired interview, Tim Henson from the progressive rock band Polyphia discussed how he blended Top 40 with the music of guitar virtuosos like Steve Vai to create his own signature sound. Although few of us will reach the heights Tim has, we can all create new, unique music, and listening to a lot of different kinds of music will help.

    Listen to experts listen to music

    I honestly don’t know how we learned anything before YouTube.

    Yes, there is tons of absolute mindless drivel on the platform. But there is also a vast amount of high-quality educational material.

    I have personally learned more about music theory by watching Rick Beato’s videos over the last two or three years than I did being in the school band from fifth through twelfth grade.

    Michael Palmisano is another outstanding channel, especially for guitarists. Both channels break down songs to explain exactly why they work. Both men can help you develop your ability to really listen to and understand music.

    Michael Palmisano unpacks a phenomenal song, “Follow the Light” by Cory Wong and Dirty Loops

    Teachers like Rick and Michael are miracle workers when it comes to musicians. Just by watching their free content online, you can educate yourself to a degree once possible only by going to a college like Berklee. And you can shave off years of learning music theory by trial and error — like we used to have to do back in the day.

    The experts are out there making content, and most of it is free or low cost. So use it.

    Listen to your bandmates

    I play in my church’s worship band, and in addition to Sunday morning services, we have Thursday evening practices.

    Occasionally, either the drummer or the bassist can’t make it to practice. Let me tell you, it is hard to play my guitar when either of those two is missing! This is because I am paying attention to both drums and bass in order to create my part. I need to match intensity with the drums, and I need to play something that complements the bass line.

    Listening is a critical part of my own playing music with others, and it should be part of yours as well. Paying attention to what the people around you are playing or singing can help you add to the music. When you’re more focused on your own part, by contrast, you can easily sing over another musician, play too softly or loudly, or even be off beat without realizing it.

    Music-making is a group activity. When you find yourself in a band setting, the best thing you can possibly do is listen carefully to what everyone else is doing.

    Listen to yourself

    This is the toughest one, but it can help the most too. When you play an instrument or sing, there are really two audiences. You perceive your own music in a certain way, and other people perceive it differently. The trick is to understand that how you sound to yourself may be better or worse than how you sound to others.

    This is where recording yourself can really help. Maybe you thought you nailed that Eruption cover at your band’s show last night — but the footage says otherwise. Or maybe you felt you butchered singing “Crazy” at karaoke night, but when you review the video on your friend’s iPhone, you realize you didn’t do too bad of a job after all.

    Recording yourself can give you objective feedback that is hard to get from any other source. And if you are completely honest and nonjudgmental about your musical performance, it can be a very useful tool to help you quit bad habits and improve your singing or playing.

    This video is your reward for reaching the end of the article. Congrats!

    It’s hard to imagine a more useful skill in life than listening. It can help you grow as a person, it can help society as a whole, and as we’ve discussed in this article, it can even help you develop your musical chops. So why not buck the trend and be countercultural today? Spend some time just listening.